
How to activate a service in Feide#
To give users access to a service, it needs to get activated by one of the Feide administrators of the organization.

Administration of services with Feide login is done in the customer portal under the tab “Services” in the menu. It shows an overview of which services are activated for your organization.
To activate a new service, press “Activate a new service.”
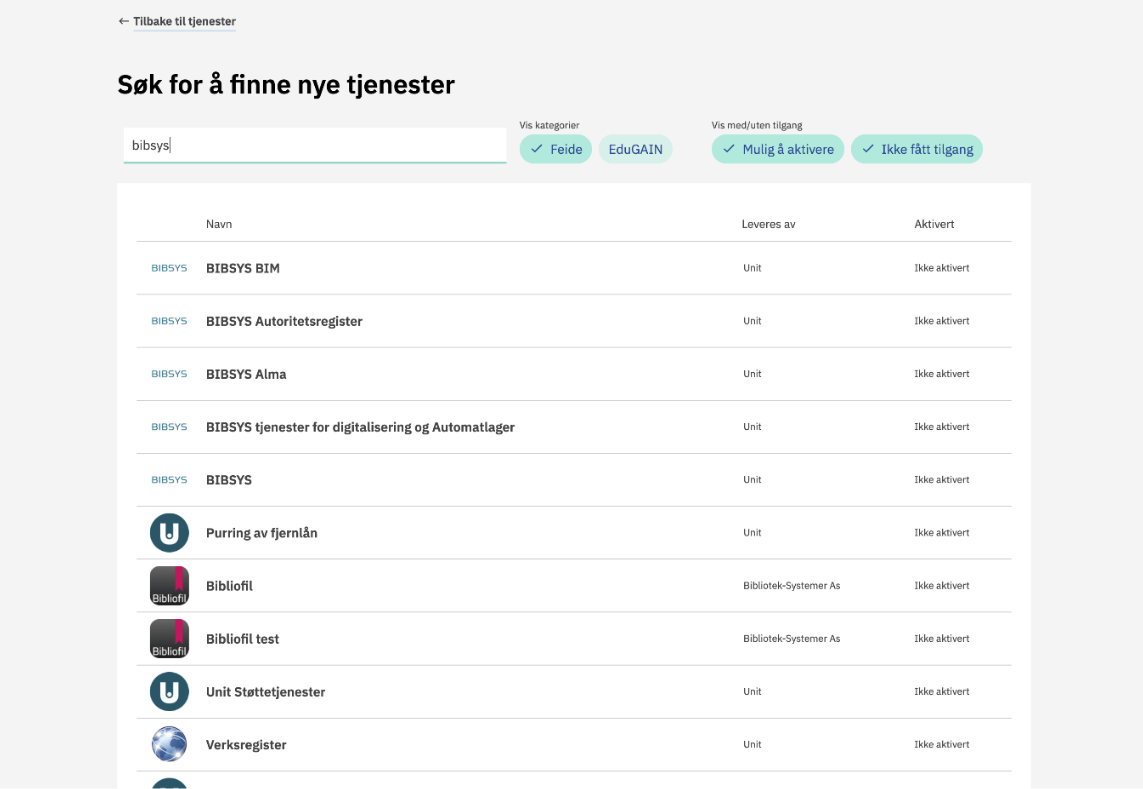
Search for the service you want to activate. You can search for both the name of the service and the service provider’s name.
Click on the name of the service you want to activate.
If you don’t have access to activate the service, you need to request access from the service provider.
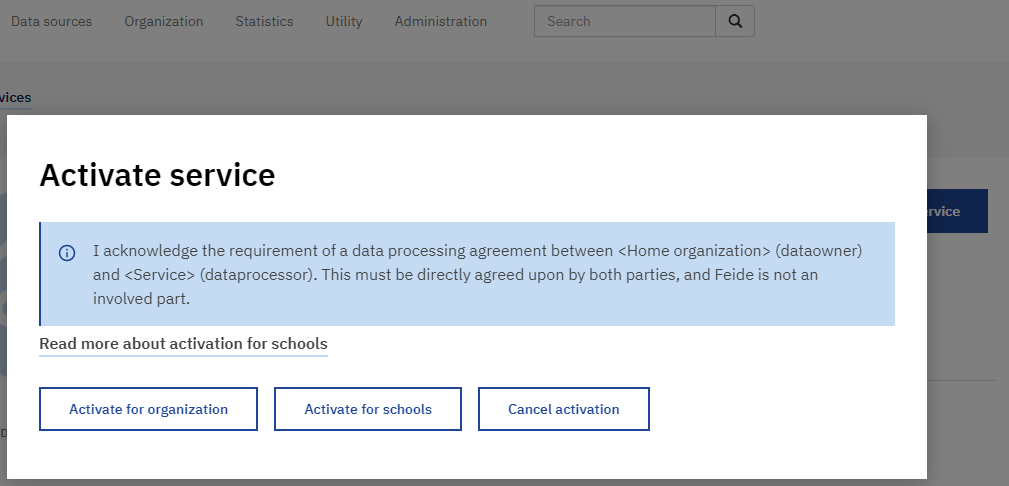
Press the “Activate this service” button.
Then you get the choice between “activate for organization” or “activate for schools”.
Note
Activating services for individual schools is only applicable for organizations from the lower education sector.
Before activating the service, an agreement on the processing of personal data (data processing agreement) between the host organization (data owner) and service provider (data processor) is required, and the host organization needs to do a risk assessment of information security in the service. Both parties must directly agree upon this, and Feide is not an involved part. Read more about the responsibilities of host organizations here!
When pressing one of the activation buttons, you need to confirm that you are aware that the school owner needs to have an agreement for handling personal information (data processing agreement). Read more here!
If you want to activate the service for all schools at the organization, click the “activate for organization” button. Please be advised that if you want to activate for the entire organization after access have been given to specific schools, you would have to deactivate the service for these schools before activating for the entire organization.
If you activate the service for the organization, the service will be activated for the whole organization, including possible future units/schools and for users that are not registered under any units/schools, typically users that work in central IT at the organization.
Warning
Make sure that the organization numbers are correct before activating services for individual schools. Read more on how this is done in our FAQ.
If only some schools need the service, you can activate the service for individual schools with the same school owner by clicking on “activate for schools”. If only some schools have got access to activate the service, the option to activate for the organization is disabled. Contact the service provider to enable activation for the whole organization and not individual schools.
When activating the service for individual schools, you mark the schools that want access to the service. Note that this does not include users that are not registered under any unit/school. Users who are not registered under any unit/school are typically users who work in central IT.
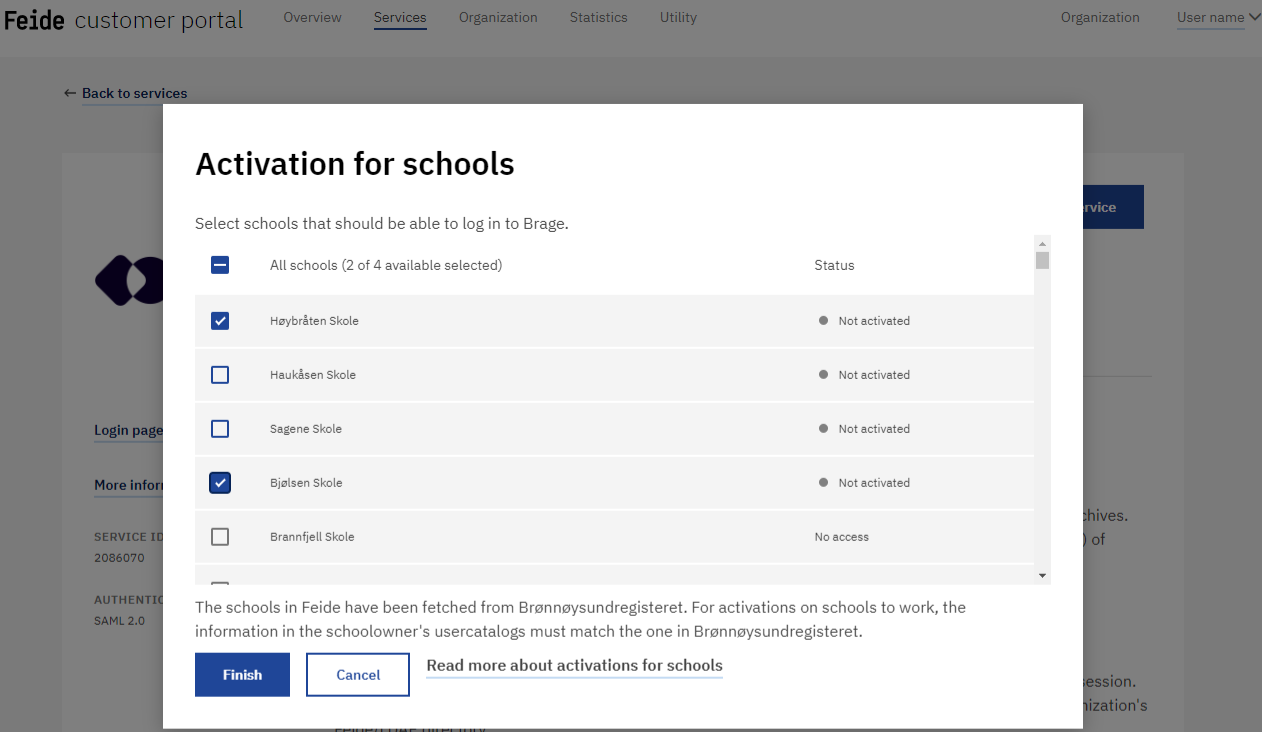
To activate the service, click on the “Finish”-button at the bottom of the page.
Should you experience any problems with access for users even though the service is activated, see our troubleshooting guide.
How to remove access or deactivate the service#
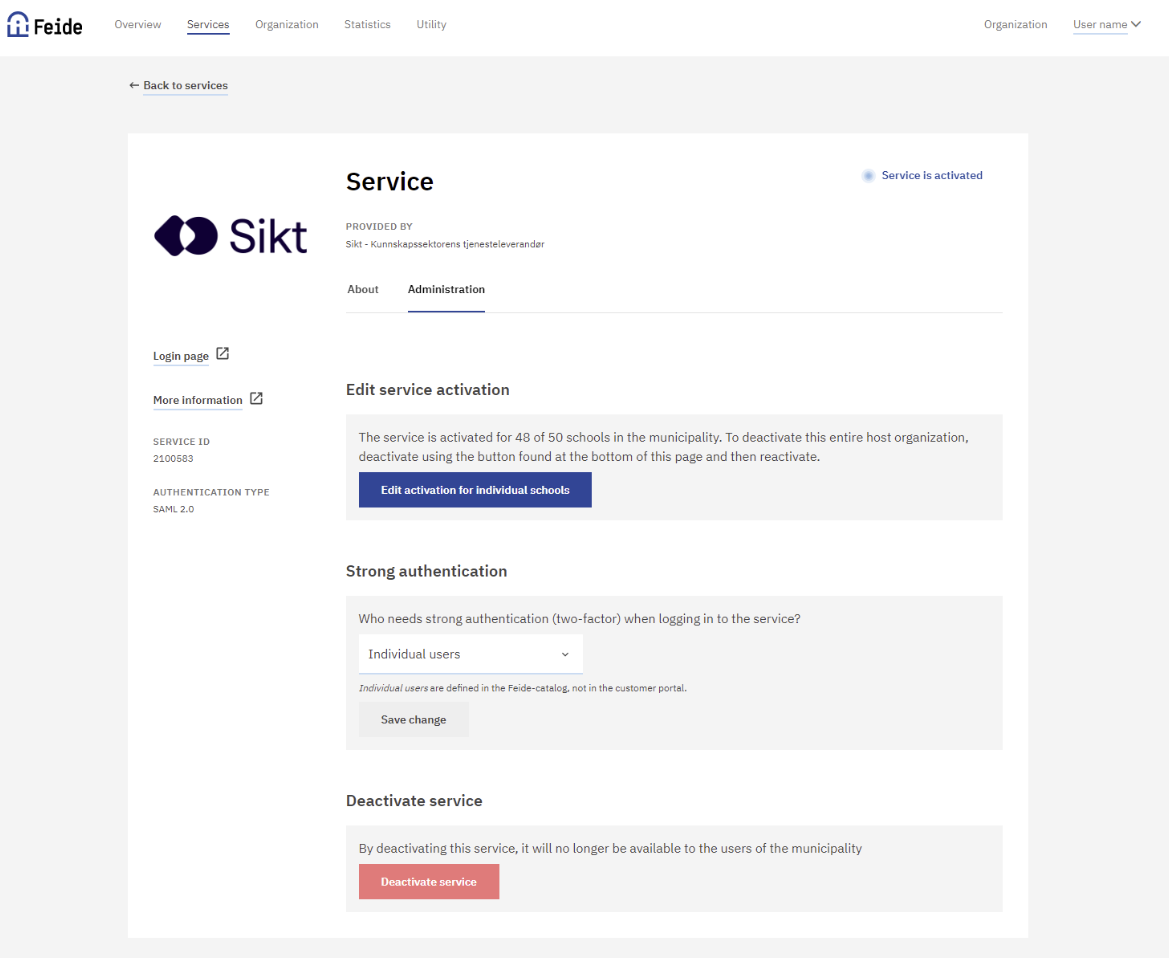
If a school needs to activate or deactivate the service later, this is done in the service’s administration tab by clicking on the “Edit activation for individual schools” button.
If you want to deactivate the service for all users at the organization, this is done at the bottom of the page by clicking “Deactivate service”.