
Feide login with Entra ID#
Entra ID is Microsoft’s login solution, and this is used for authentication on services like Office 365, Teams, and Outlook. To access these services, users must sign in with a Microsoft work or school account. With Feide login with Microsoft work or school account, it is easier for the users to log in to those services. The user can use the same account regardless of whether they need to log in to service in Feide or the Microsoft single sign-on ecosystem.
It may be helpful to disable Feide directory authentication if the organization wants all users to sign in with a Microsoft work or school account when login in with Feide. Read more about this here.
Below are the steps to configure Feide login with Entra ID.
1. Same username in Feide and Entra ID#
To be able to authenticate a user in Feide using Entra ID, Feide must connect the user logging in using Entra ID to a Feide user of the organizations Feide directory.
To connect the user, the following Entra ID claims are used:
preferred_username: The primary username that represents the user. This is normally the Entra ID User Principal Name, but depending on the Entra ID configuration it can also be other attributes.email: The email address of the user.
See the Entra ID reference documentation for more details about these claims.
Feide will match these claims with the eduPersonPrincipalName and mail attributes in the Feide directory.
Either the preferred_username claim must match the eduPersonPrincipalName attribute, or the email claim must match the mail attribute.
If the user does not have an email address in Entra ID, Feide will additionally try to look for the preferred_username claim in the mail attribute.
If Entra ID does not include a domain name in preferred_username, Feide will add the domain of the organization when looking for the eduPersonPrincipalName attribute.
2. Add new value in the attribute for a strong authentication method (only for organizations using Strong authentication)#
Organizations can use Entra ID to implement multifactor and strong authentication at level 3 in Feide. This requires the organization to have enabled logging into Feide using Entra ID and requires the organization to have provisioned multifactor authentication in Entra ID adhering to the requirements for level 3 authentication. Once that is configured, you can allow a user to use Entra ID for level 3 authentication by adding the norEduPersonAuthnMethod attribute to the user in your LDAP user directory:
norEduPersonAuthnMethod: urn:mace:feide.no:auth:method:azuread -
This flag indicates that the user has had their identity verified and that the multifactor authentication method has been provisioned to the user securely.
The requirements and guidelines for level 3 authentication with Entra ID are the same as for the other level 3 authentication methods in Feide. All level 3 authentications must satisfy identity proofing and authentication requirements in Rammeverk for autentisering og uavviselighet i elektronisk kommunikasjon med og i offentlig sektor.
Feide will set level 3 on the login if both the LDAP attribute for the account is provided, authentication methods are selected, and the MFA is used for authentication on a Microsoft account for work and education (Entra ID).
For further details see our MFA techincal specs Entra ID
3. Adding the Feide Enterprise application#
The following is one of several ways to grant admin consent for the enterprise application. For more details, please see the Entra ID documentation page.
Adding the Feide Enterprise applications#
In order to add the Feide Enterprise application, insert your tenant-id into the following URL and open it in a browser. Only {tenant-id} in the URL needs to be changed.
URL:
https://login.microsoftonline.com/{tenant-id}/adminconsent?client_id=48d2c7ce-eea9-40d0-99af-3c6a8657d3c3
You should then be taken to the following page to accept the terms of use:
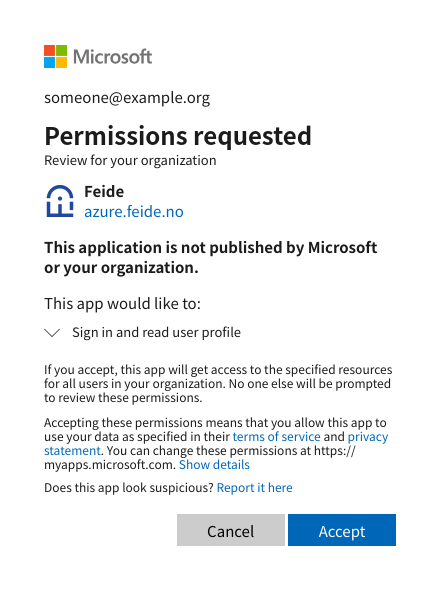
Having accepted the terms of use, you may be shown an error page from Feide.
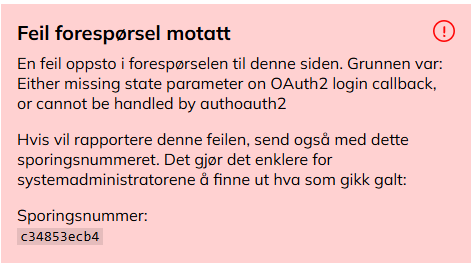
You can safely ignore this error page, but do verify that the application has been successfully added.
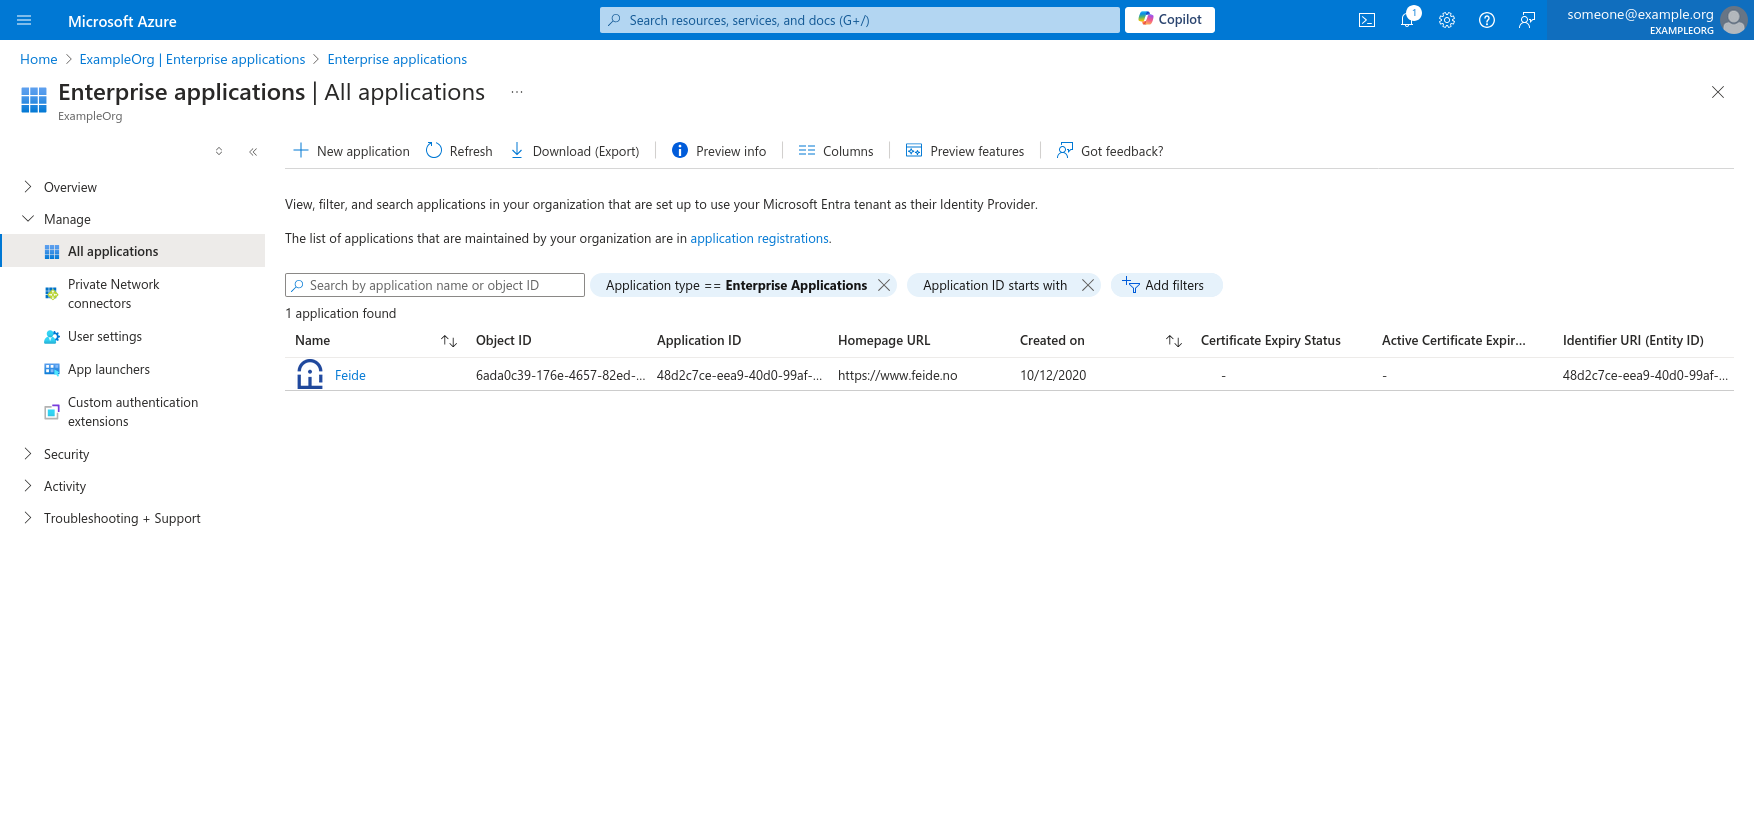
Verifying that the application is added#
After completing step one, including accepting the terms of use, the application should be visible from the “all applications” page.
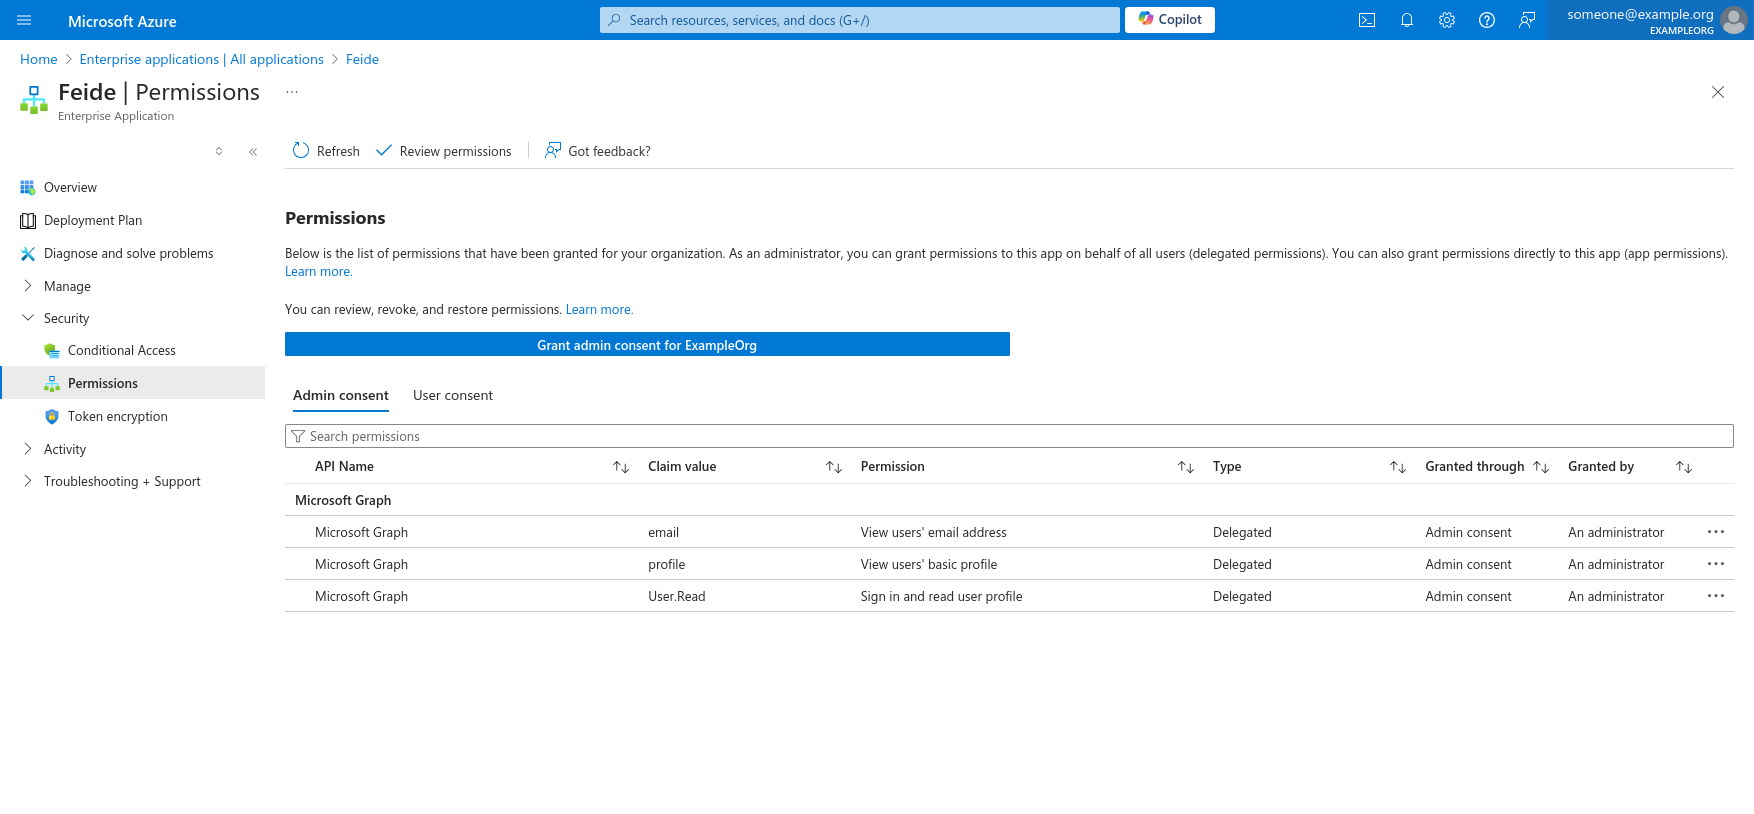
Approve access on behalf of the organization#
In the permissions page the administrator should be able to approve access on behalf of the organization. Verify that the admin consent is given by checking the column on the right: “Granted through.” Click the blue “Grant admin consent-” box if it is missing.
After completing these three steps, a Feide-administrator should be able to administrate the remaining setup from the Feide Customer Portal.
4. Enable Entra ID in the customer portal#
Once the Feide Enterprise application is added, the Feide login with Entra ID can be activated in the customer portal. This is done by editing the login methods on the organization tab.

Check off for Azure AD / Microsoft account use and enter the tenant ID for the organization Entra ID.
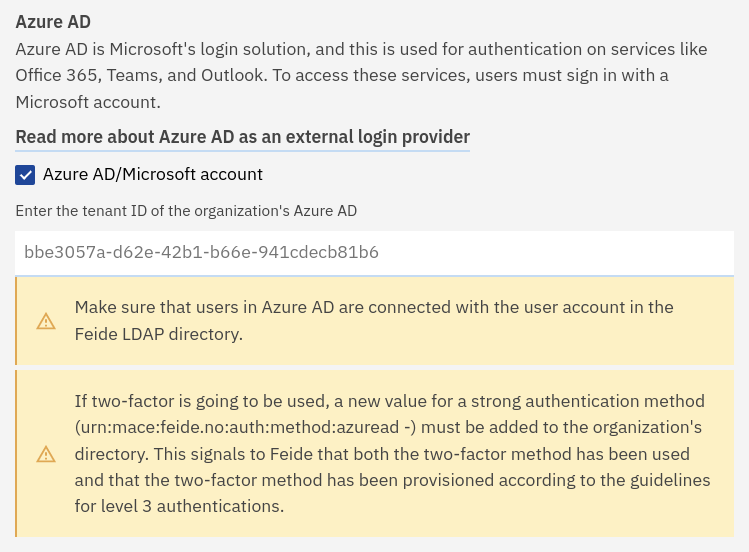
To save the change, click on Save at the bottom of the page.
It may take up to 10 minutes before the login with a Microsoft account is available as an option in the organization Feide’s login window.