
How to manage access to services through Feide#
Does your service need to identify and authenticate international users or people outside the education sector? When using OpenID Connect, a service can enable other login providers in addition to Feide. This is done under the “configuration” tab. More information on different login providers is available at OIDC configuration.
If your users are students, researchers, teachers or other employees within Norwegian education sector, you probably want to enable Feide login. All public universities/colleges and primary schools, and several private primary schools use Feide today. You can find an overview of organizations that use Feide here .
If the service is published, the organizations have access to activate the service. Each individual organization must actively choose to activate the service. Feide activation is opt-in, meaning you as a service provider can only give access to the organization. They in turn have the responsibility of activating the service before login becomes available to their users.
Feide administrators at the host organizations can activate the service in Feide’s customer portal. There they can search for the service by: name, description, or name of its service provider. Only after the service has been activated by the organization can users login to the service by selecting their organization in the Feide login to the service.
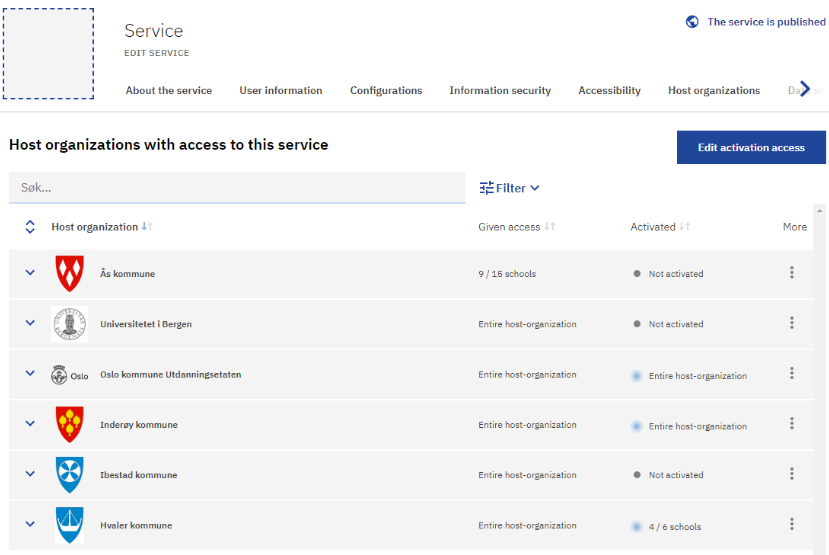
Choose which host organizations or individual schools will have access to activate the service in the customer portal under the “Host organization” tab when editing the service.
You get an overview of which organizations have been given access to activate the service in the column “Given access” and which have activated the service in the “Activated” column. By clicking on a host organization, you see information about their support email, the date they have given access, and the date the service is activated.
To see the names of the schools that have been given access or have activated the service, you need to click on “edit activation access.”
You enable which organizations that get access to activate the service by clicking on “Edit activation access” in the right top corner of the page.
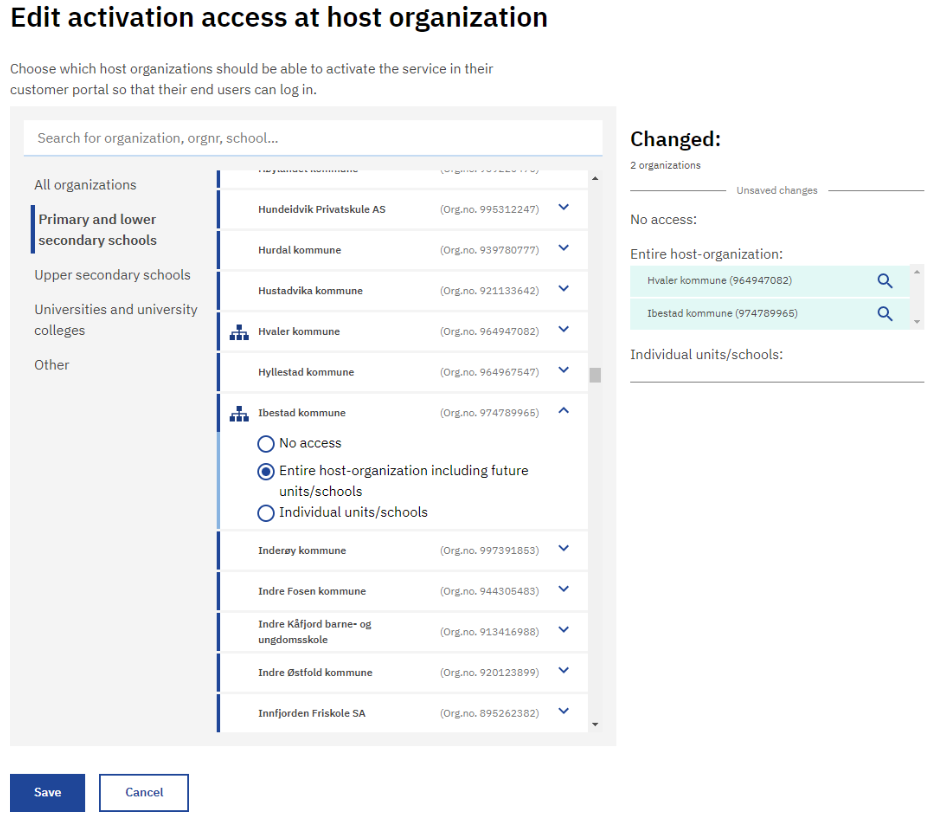
When editing which organization that get access to the service you get an overview of all the organizations that you can give access to. The organizations that have been given access are marked with an icon on the left side of the organization name. The icon is a figure of an organization structure to illustrate if the whole organization has access to the service or if parts of the organization has access. If the whole figure is filled, the whole organization has access. If one of the boxes in the icon is filled, access has been given for individual schools.

You can filter this view by type of organization on the right side. Type of organizations are: Primary and lower secondary schools, Upper secondary schools, Universities and university colleges or Other. “Other” are organizations like museums, research institutes, government bodies or student associations.
If you want to give access to a specific organization or school, you can use the search field to find the organization. You can search for the name and organization number both for the organization that is the school owner and the organization units that are the schools.
To give access to an organization click on the organization and select the access level. You can give access to the whole organization or individual units/schools.
You enable which organizations or individual schools that get access to activate your service under the tab “Host organization”.
When you select an organization, it gets added to the access view on the right.
How to give access to a service for the whole host organization#
The host organization is the school owner in primary and secondary education, i.e., the municipality or county municipality. If you give access to a municipality or county municipality, it will be given to all their schools including possible future units/schools.
When editing access, you can select specific host organizations to give access to.
Find the host organization and click on it. Then select “Entire host-organization including future units/schools”.
When you select a host organization, it gets added to the access view on the right. Here you get an overview of which organizations you have selected to give access to.
If you want to give access to all organizations, you can click on the “Toggle all organizations”-button. You limit this selection by selecting the type of organization on the right side of the page. By clicking on the button again you remove access to all the organizations including those that have activated the service. If you don’t want to save the changes, click on the “Cancel”-button at the bottom of the page so the host organization that has been activated or given access doesn’t lose that.
Access will not be given until you save the changes. This is done by clicking “Save” at the bottom of the page. If you leave the page or click “Cancel”, the selected organizations will not get access to activate the service.
How to give access to a service for individual schools#
Note
If you get feedback from users from a specific school that they can’t access your service the wrong organization number may be registered or the user are missing the organization number. To solve this problem the host organization needs to either change the information for the organization unit/school or the user in their user directory.
For further details see our troubleshooting guide.
By giving access to “Individual units/schools,” you can select which schools in the municipality or county municipality to give access to.
Note that this does not include users that are not registered under any units/schools. Users who are not registered under any units/schools typically work in central IT at the organization.
When you select the schools, they get added to the access view at the right. In this view, you get an overview of which organizations you have selected to give access to.
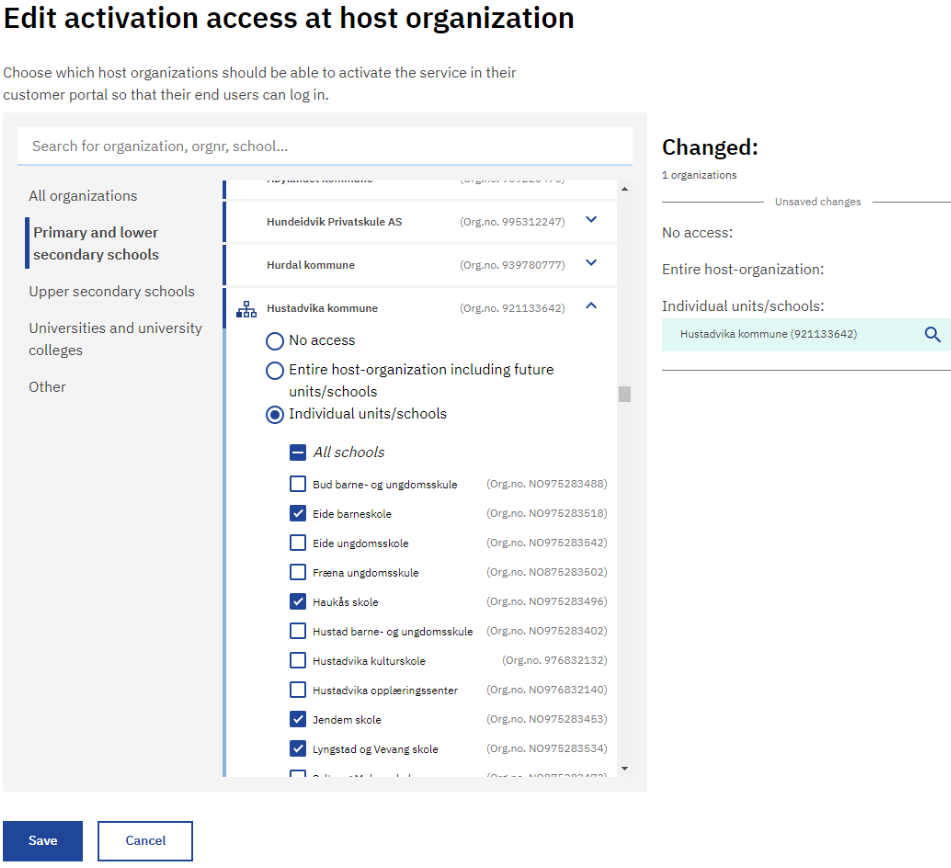
Access will not be given until you save the changes. This is done by clicking “Save” at the bottom of the page. If you leave the page or click “Cancel”, the selected organizations will not get access to activate the service.
How to remove access for organizations#
Services can remove access for organizations that have previously been given access, but not yet activated the service. This is done in the customer portal under the “Host organization” tab when editing the service, by clicking on “Edit activation access” in the right top corner of the page.
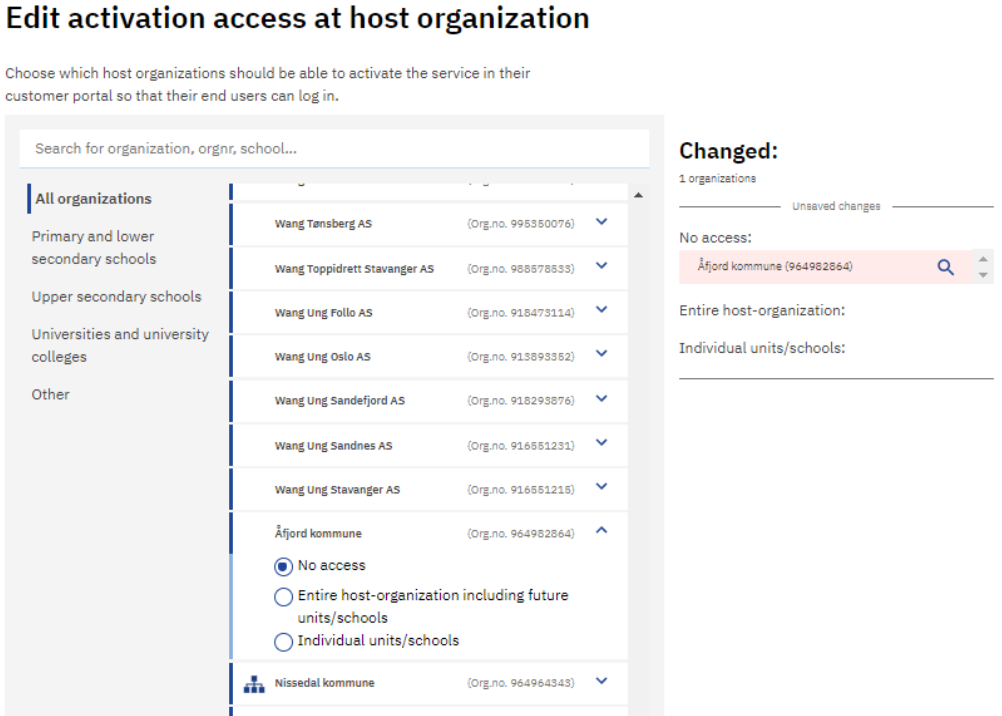
Find the organization you want to remove access for. All the organizations that have been given access are at the bottom of the list, but you can use the search field to search after a specific organization or school.
Click on the name of the organization to get the access options.
If you want to remove access for the whole host organization, select “No access”
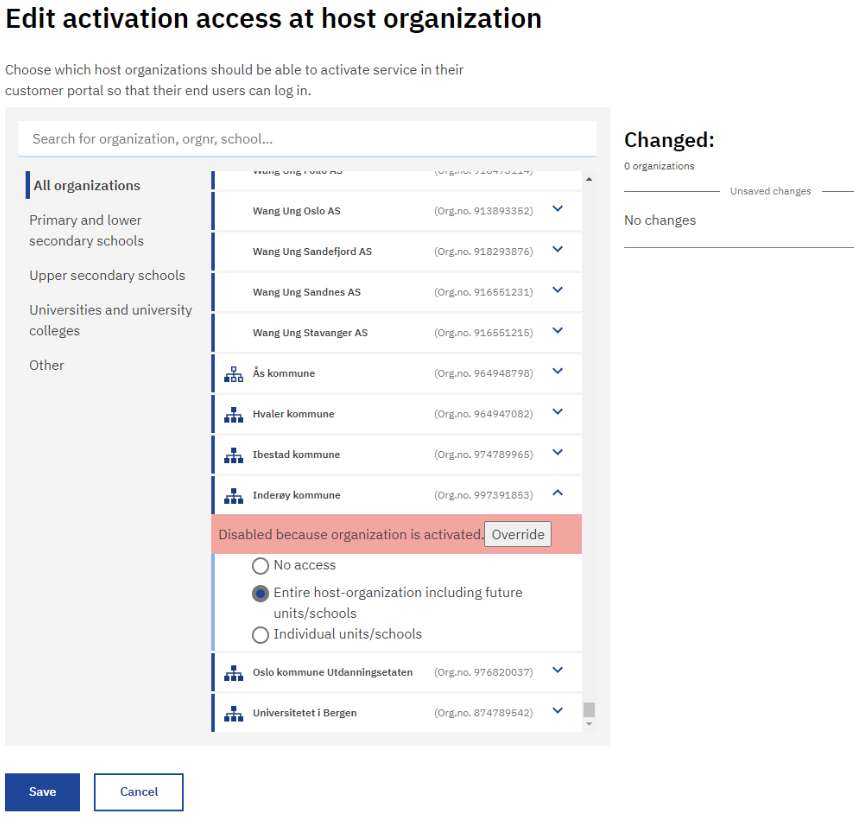
If you only want to remove access to specific school(s) at the host organization, select “individual unit / schools” and remove the checkmark for the school(s) you want to remove access for.
If the host organization has activated the service, you will get the following error message: “Disabled because organization is activated”. You can still remove the access for that organization by clicking on the override buttion as illustrated above.
To update the changes, press “save”-button at the bottom at the page.
When changes are saved, the organization must reactivate the service. So, make sure you really want to remove the access for the organization before you save the changes. If you don’t want to save the changes, press the “cancel”-button.